THE DUO JOURNAL · OCTOBER 26, 2026
Portrait vs landscape: choosing your iPhone Duo teleprompter setup
Start with the video your viewer needs. Then choose a phone position that lets you read comfortably near the recording lens. On iPhone Duo, the shape of the reading display and the shape of the exported video are separate decisions.
Three choices. One finished video.
“Portrait or landscape?” can mean three things during a teleprompter session. Keeping them separate prevents a common mistake: choosing a comfortable reading arrangement and assuming it guarantees the video shape you want.
- Reading layout: where the words, camera preview, and controls appear on the display facing you.
- Recorded frame: the camera image saved in the take, including its orientation and the subjects inside its edges.
- Export aspect ratio: the width-to-height shape of the finished file, which may preserve the original framing or crop it.
Apple’s multidisplay developer session demonstrates a teleprompter accessory on the outer display while the camera interface remains on the inner display. That illustrates why a reading surface is not the same thing as the camera’s saved frame. Each app still needs its own recording and display behavior checked.
In Teleprompter Duo’s current implementation, capture uses a camera rotation angle when recording starts. Export separately offers Original framing, vertical 9:16, square 1:1, and landscape 16:9 choices. Use the preview and an exported test to verify the combination on your device and installed version. The general iPhone Duo teleprompter setup guide covers the script-to-recording workflow.
Choose the frame for what needs to stay visible.
Decide where the video will appear and what the viewer must see. A close explanation from one speaker and a demonstration involving two objects may need different compositions even when they use the same script.
| Your video | Starting frame to consider | Check before recording |
|---|---|---|
| One speaker for a vertical feed | Vertical, often 9:16 | Face, hands, and any product remain inside the narrow frame. |
| A lesson with a wide prop or whiteboard | Landscape, often 16:9 | Both speaker and teaching material stay readable. |
| A square destination or template | Square, 1:1 | The square crop leaves useful space above and beside the subject. |
| Versions for both wide and vertical placements | Compose deliberately for both, or record separate takes | Every essential gesture and object survives each intended crop. |
These are composition starting points, not universal platform rules. For example, YouTube’s current Shorts upload guidance accepts square or vertical video and specifies a maximum duration of three minutes. That does not make every square or vertical clip the right creative choice for your subject. Check the destination’s current requirements when you publish.
For a product demonstration, rehearse the widest movement you expect to make. Hold the item where you will show it, turn it as planned, and inspect the edges. A frame that works for your face alone may lose the demonstration when your hands move.
Place the words near the lens. Keep the frame deliberate.
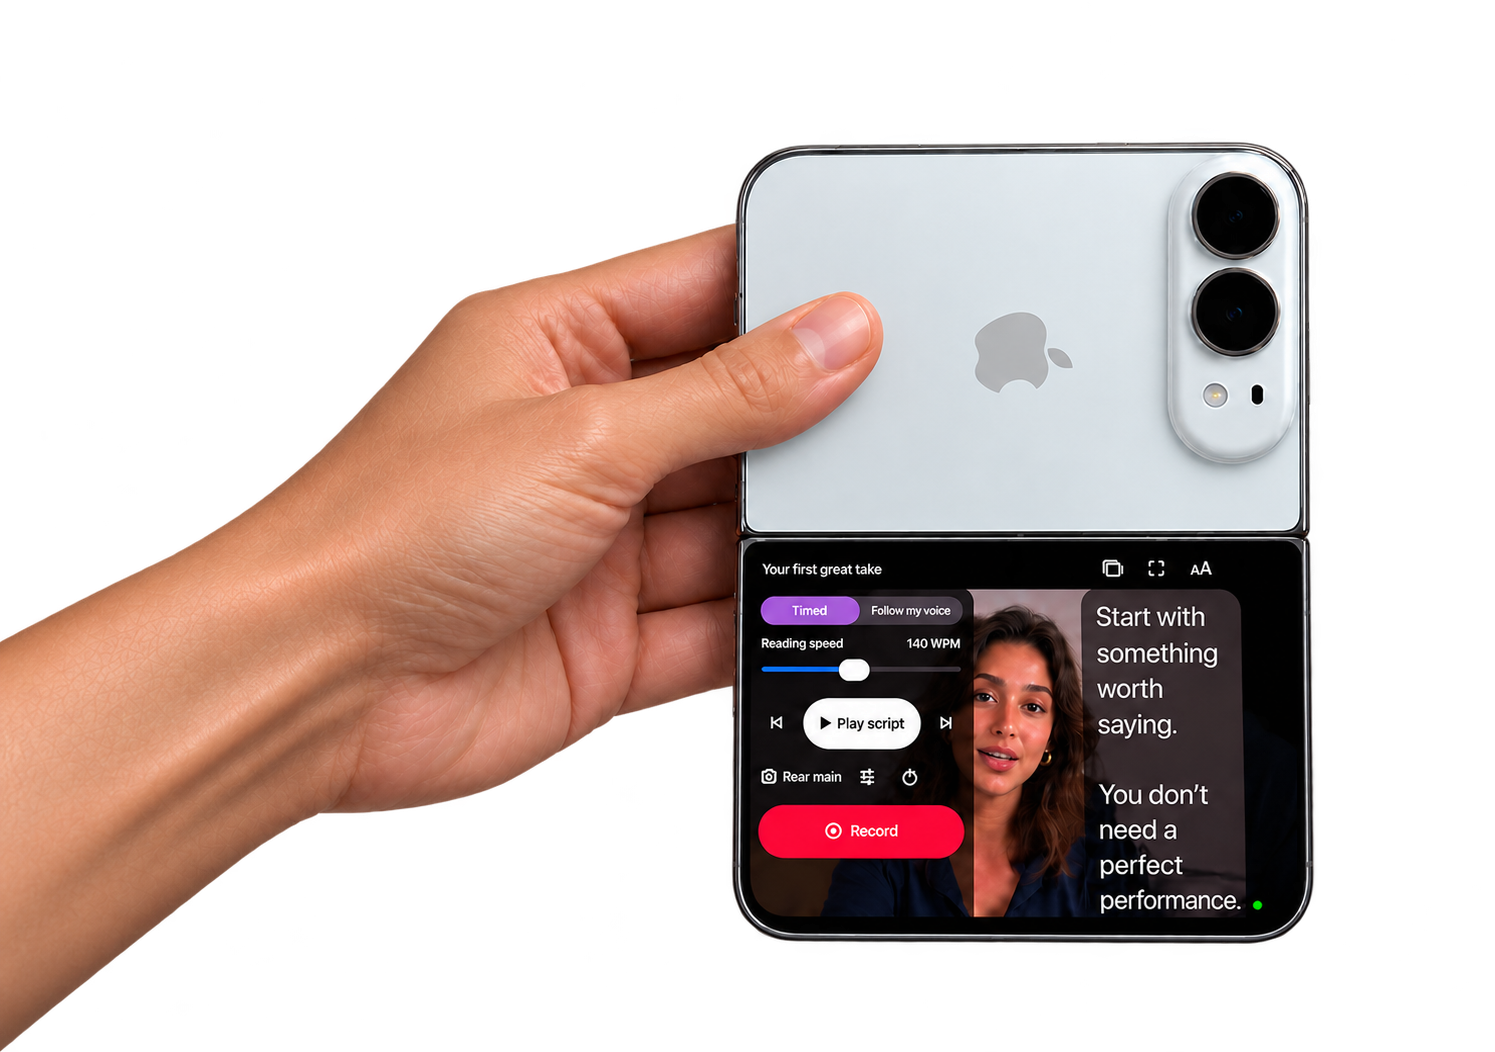
With the cameras above the reader, start with a narrow column of words near the lens. Set the phone securely at a useful height, then check text size from your actual speaking position. Do not move closer only to read smaller text if that changes the shot you intended.
The side-by-side arrangement gives you another way to hold and view the setup. It can be useful when that position makes the controls or preview easier for you to see. The important question is still where your eyes go while you speak, rather than whether the whole device looks wide or tall in a photograph.
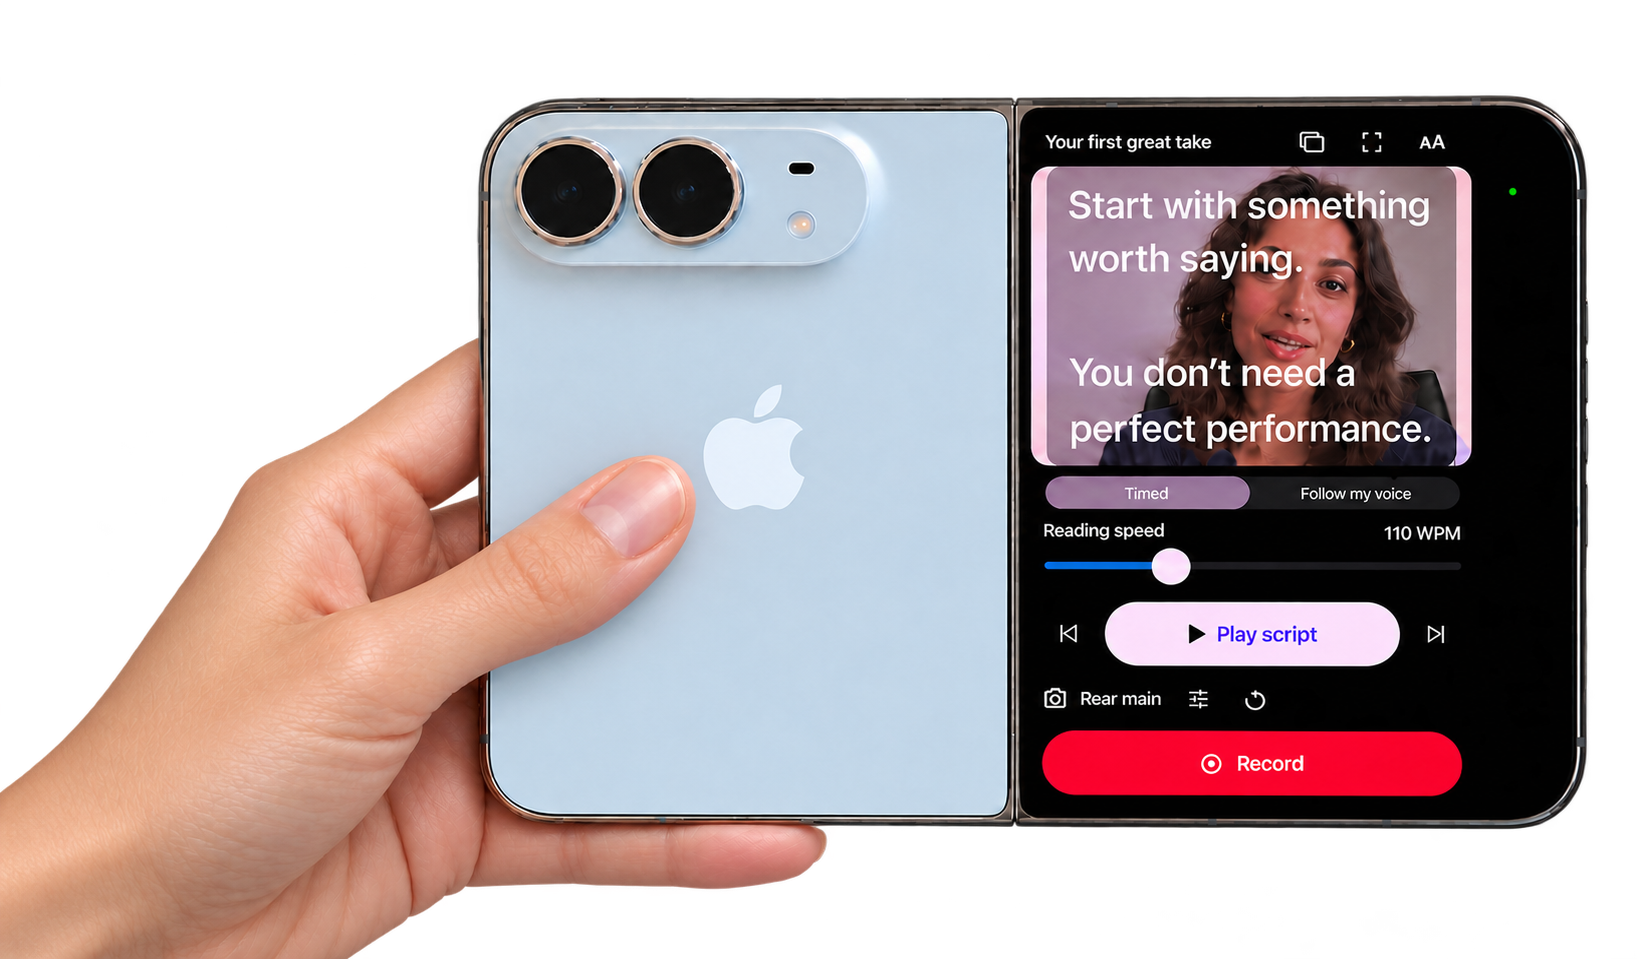
After changing the arrangement, rehearse the same paragraph again. Adjust reading column width and position until the words are easy to find. Do not stretch the script across every available pixel simply because the display has more room. Our guide to natural teleprompter eye contact explains how distance, column width, and lens placement work together.
If a layout change makes the reading feel different, keep your script and speaking pace steady while you adjust the display. Then revisit the pace if necessary. The reading-speed calibration exercise helps separate a scrolling problem from a framing problem.
A crop changes the edges. It cannot recover missing action.
A vertical export from a wide take usually removes material from the sides. A wide export from a tall take usually removes material from above and below. Rotating an image and cropping an image solve different problems: rotation changes which way it faces; cropping selects a smaller rectangle.
Teleprompter Duo’s current aspect-ratio export uses a centered crop. If you stand near one edge of a wide recording, selecting a vertical output does not automatically move the crop to follow you. Keep the subject inside the intended center area, inspect the exported result, or record another take with a better composition.
For a concrete example, imagine a wide recording with you in the center and a product on a table to your right. A narrow center crop may preserve your face while removing the product. Increasing the output dimensions later cannot bring that missing product back into the selected frame. Capture the demonstration inside the usable area from the start.
Original framing is useful when you want to preserve the take’s shape for editing elsewhere. A ratio preset is useful when you have checked that its crop retains the story. Neither choice substitutes for reviewing the actual file. Feature availability and recording formats depend on the installed app, device, and system version.
Run this short orientation test before the full take.
- Choose the destination. Write down the required shape and the essential subject: for example, “vertical, face plus the product held at chest height.”
- Settle the phone position. Choose camera-above-reader or side-by-side. Secure the device and confirm the selected recording camera in the preview.
- Set the reading display. Read from your intended distance. Adjust the text without changing your planned composition unnecessarily.
- Record a brief sample. Say a few sentences and include your widest planned gesture. Keep the device position steady through the test.
- Review the saved take. Check that it is upright, the intended camera was used, and the face, hands, or demonstration remain visible.
- Export the intended ratio. Open the exported video outside the recording interface. Check its shape and every edge again, including any captions you added.
- Change one thing and repeat if needed. Adjust position, composition, or export choice according to the problem you found.
If the file is sideways, establish whether the problem appears in the saved take or only after export. If the file is upright but the subject is missing, inspect the composition and crop instead. Keep the original take while you investigate. Starting with that distinction makes a support request more precise, too.
One script can support two versions. Plan the pictures separately.
Consider a short lesson about adjusting a desk lamp. In a vertical version, you could hold the lamp close enough that the viewer sees the switch beside your face. In a wide version, you could show the entire desk and point to the lamp’s position. The core explanation can stay similar, but the gestures and useful framing change.
If you need both versions, try the intended crops on a rehearsal before filming the full script. When important action cannot fit both, record two deliberate takes. That gives each version a composition designed for its viewer. Do not assume that changing an export preset creates a second independently framed recording.
Keep separate script notes outside the spoken text when a version needs a different gesture or introduction. The teleprompter script-formatting guide helps keep those production notes from becoming accidental spoken lines.
Common portrait and landscape questions.
Does a landscape-looking reading screen mean the saved video is landscape?
No. The reading interface, captured camera image, and export crop are separate parts of the workflow. Use a short recorded and exported sample to confirm the final result.
Can I switch the phone position halfway through a take?
For a predictable result, stop, choose the new position, check the preview, and start another take. Do not rely on turning the phone during a recording to produce two clean versions.
Is portrait better for eye contact?
The label alone cannot tell you. Judge the words’ distance from the lens, your reading distance, and the movement visible in your test. Use the arrangement that supports the composition and lets you speak comfortably.
Your setup. Your next take.
Compare the full workflow in our iPhone Duo teleprompter buying guide, then use the short test above to choose a frame for your own video.
Explore Teleprompter Duo ↗